Tutorial Three: Adding Point Mutations and Using Loop Rebuild
Estimated Time: 20 minutes
This tutorial will instruct users how point mutations can be added to structures using the Design Action, how loops can be refined through Loop Rebuild, and how the Selector tool is used. The optimized structure generated in Tutorial Two will be used as an example; it is recommended to first complete Tutorial One and Two.
(Caveat: The estimated time does not include the time it takes for jobs to run on the server. There will be several pauses while you wait 20 minutes or more for structures to run on the cloud before you can move on to more steps.)
1.) Adding a Point Mutation to a Structure Using Design
Point mutations can be made to existing structures using Design; in this example a Proline to Glycine mutation will be made to the minimized structure from part 4 of Tutorial Two. To get started click on the Optimized 5KIZ folder. Click the ![]() to the left of the structure name in order to select it.
to the left of the structure name in order to select it.
Then, in the right window, click ![]() . This will open a tab in the center window. It will have a chart showing the protein positions and the sequence in the first two columns. The remaining columns are potential mutations that you can sample.
. This will open a tab in the center window. It will have a chart showing the protein positions and the sequence in the first two columns. The remaining columns are potential mutations that you can sample.
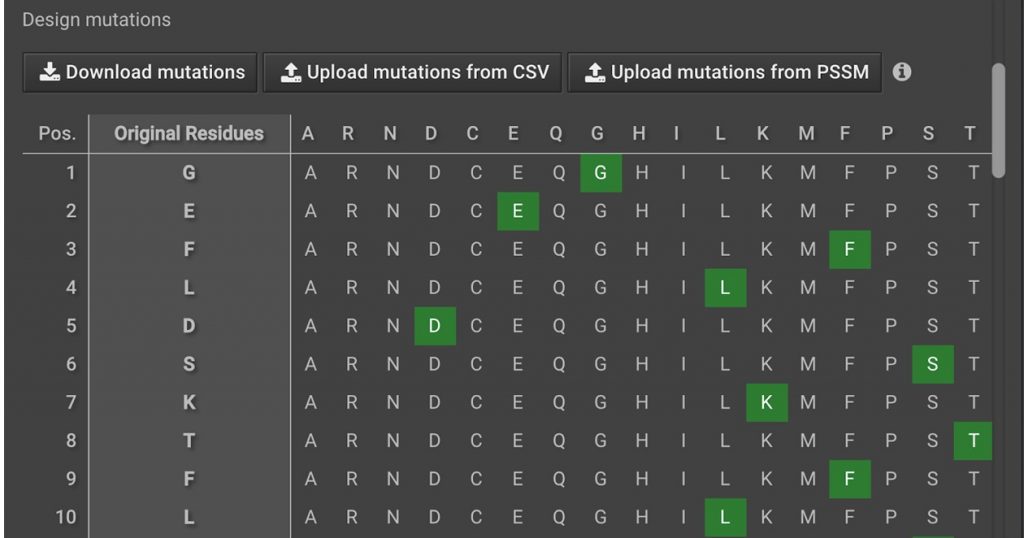
By default, only the original positions are selected. Scroll down to position 94, which is a proline. Click the P to remove proline and click G to add Glycine, which will become green as shown below.
![]()
Leave ![]() and click
and click ![]() . Once it is finished running, change its name to P94G.
. Once it is finished running, change its name to P94G.
2.) Create a Selector and Run Loop Rebuild
After a point mutation has been added to a structure, new low energy conformations should be sampled to generate the most stable structure. In this tutorial the Loop Rebuild tool will be used to optimize the structure of the point mutation made in part 1.
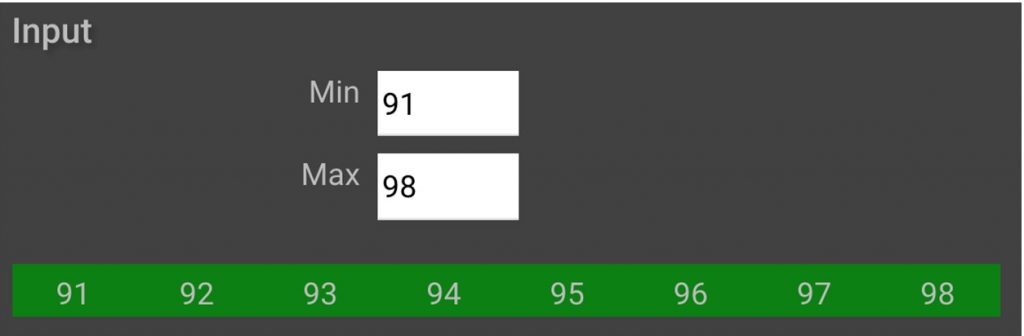
The P to G mutation occurs in the middle of a loop, residues 91-98, which means this mutation is not likely to affect regions of the protein outside of the loop.
To make it easier to highlight the loop for future steps a Selector (a group or residues) will be created.
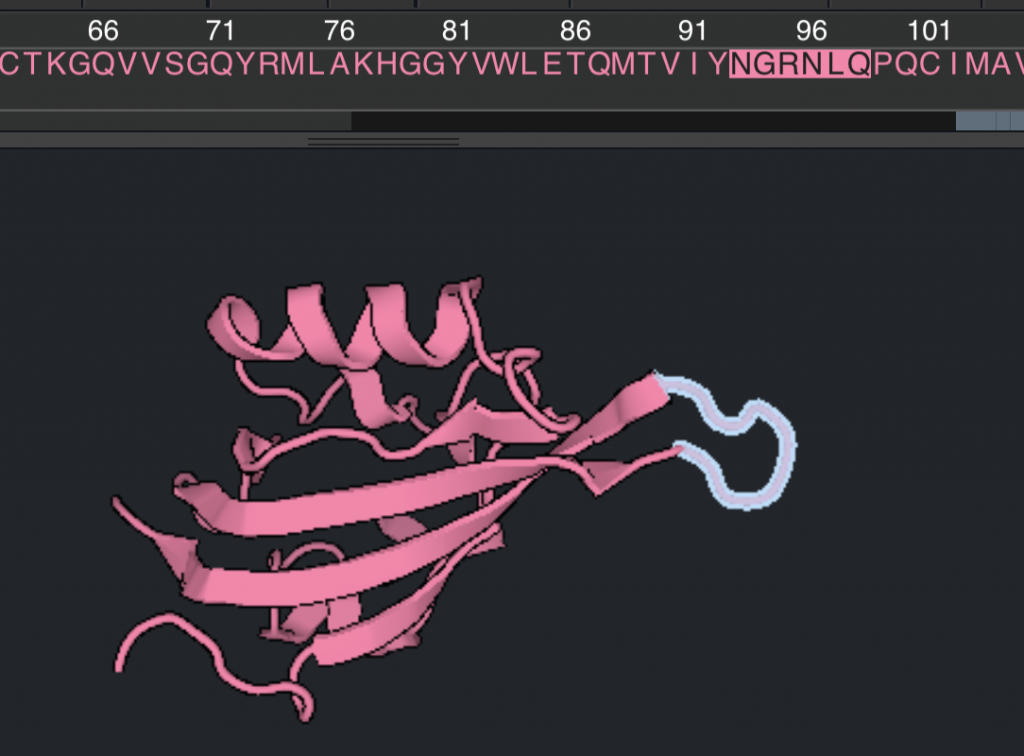
Click on the P94G folder. Click the ![]() in order to bring the structure into the Structure Viewer. Click
in order to bring the structure into the Structure Viewer. Click ![]() in order to bring the sequence into view. Scroll to the right and highlight residues 93-98 (NGRNLQ).
in order to bring the sequence into view. Scroll to the right and highlight residues 93-98 (NGRNLQ).
Click ![]() in the left lower window under
in the left lower window under ![]() . This will create a Selector called Selector 1:
. This will create a Selector called Selector 1:
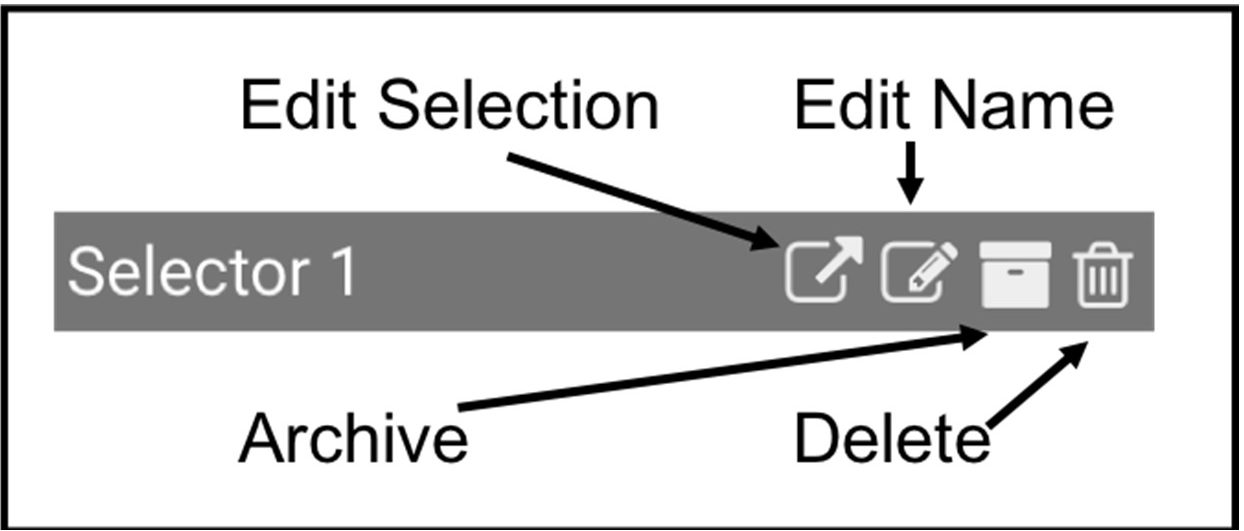
Click ![]() and change the name to Loop. Then click
and change the name to Loop. Then click ![]() in order to open a tab that allows you to edit the details of your Selector. Change the range of the Selector to start at position 91. Click on positions 91 and 92, which will turn green. Click
in order to open a tab that allows you to edit the details of your Selector. Change the range of the Selector to start at position 91. Click on positions 91 and 92, which will turn green. Click ![]() .
.
Now, return to the tab for P94G and Click on the Loop Selector. The whole loop should become highlighted. Select the structure by clicking ![]() . And click
. And click ![]() . Choose these settings:
. Choose these settings:
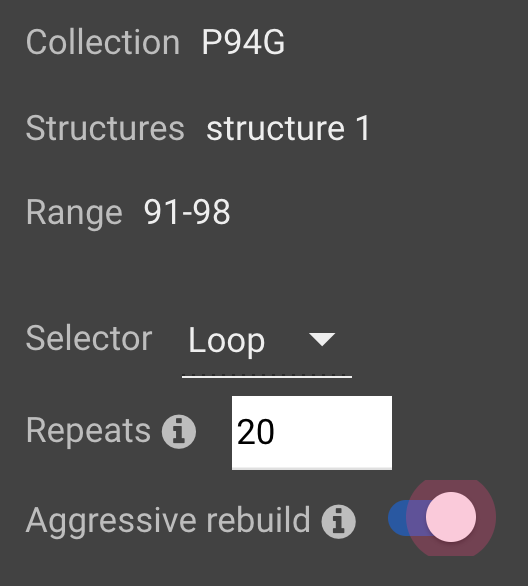
Click ![]() . For more information on Loop Rebuild, click here.
. For more information on Loop Rebuild, click here.
Once the Loop Rebuild has finished running, change the collection name to P94G Rebuild and click on the folder to see the results. Since glycine will make the loop far more flexible than proline, the results may vary significantly.
Click on the ![]() column twice to see the high and low RMSD values. In one example run, the RMSD values varied from 0.4 to 1.6, which is a large range. Since there are only 20 structures click the
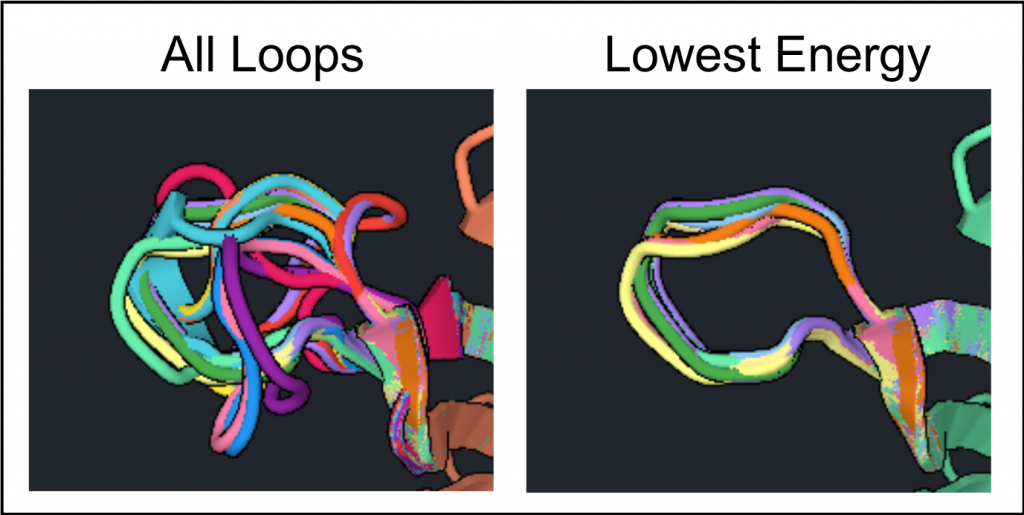
column twice to see the high and low RMSD values. In one example run, the RMSD values varied from 0.4 to 1.6, which is a large range. Since there are only 20 structures click the ![]() for all structures in order to see where the variation occurs as shown below on the left.
for all structures in order to see where the variation occurs as shown below on the left.
The loop can be centered by clicking the Selector called Loop and clicking ![]() , then zoom in (trackpad, mouse scroll, or control/command +). Now, rank the structures by
, then zoom in (trackpad, mouse scroll, or control/command +). Now, rank the structures by ![]() and click only the
and click only the ![]() to show the structures that are within 2 Rosetta Energy Units (REUs) of the lowest energy structure. In one example run, there were 9 structures with Scores within 2 REUs of the lowest Score.
to show the structures that are within 2 Rosetta Energy Units (REUs) of the lowest energy structure. In one example run, there were 9 structures with Scores within 2 REUs of the lowest Score.
In this example the lowest energy loops appear to be converging on the ideal conformation. As in part 3 of the tutorial when Relax was used to generate the lowest Rosetta energy conformation, Loop Rebuild should be run multiple times to generate the most stable conformation for the loop.
Select the lowest energy loop structure and run another Loop Rebuild with 20 repeats but this time run it with Aggressive Mode off because it appears the loop is converging on the ideal conformation. Once the Loop Rebuild is completed, change the folder name to P94G Rebuild2 and look at the results to see how the Scores for the structures changed.
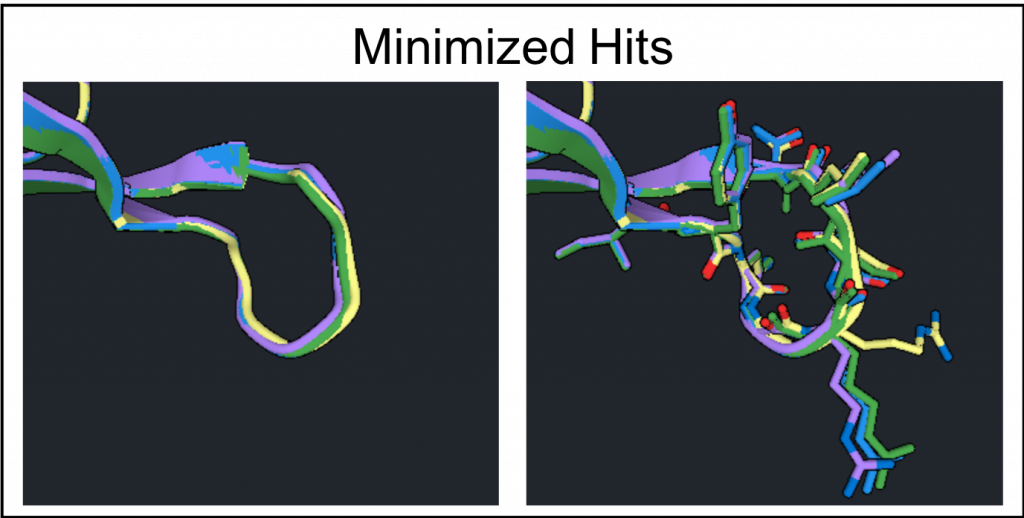
In this example run there were no energy improvements and Loop Rebuild does not need to be run again. To generate the optimized loop structure select the 4 structures with the lowest Scores from allRebuilds and run Minimize. The results are shown below where the residues converged for the backbone, the image on the left, and show some variation for favorable rotamers, the image on the right.